
Manage Bank Accounts
View the video here:
Send your paycheck directly to your bank using direct deposit. (Pay cards are only available in limited trial locations.)
Before your direct deposit can begin, your bank confirms account information and performs test transactions. Hard copy paychecks (live checks) are printed for pay days that occur during this verification process, which takes a minimum of 2 weeks.

Four Stages to Electronic Pay
Refer to the following sections:
Find Bank Details
| STEP 1 | In Your Self-Service, log in as an Employee. |
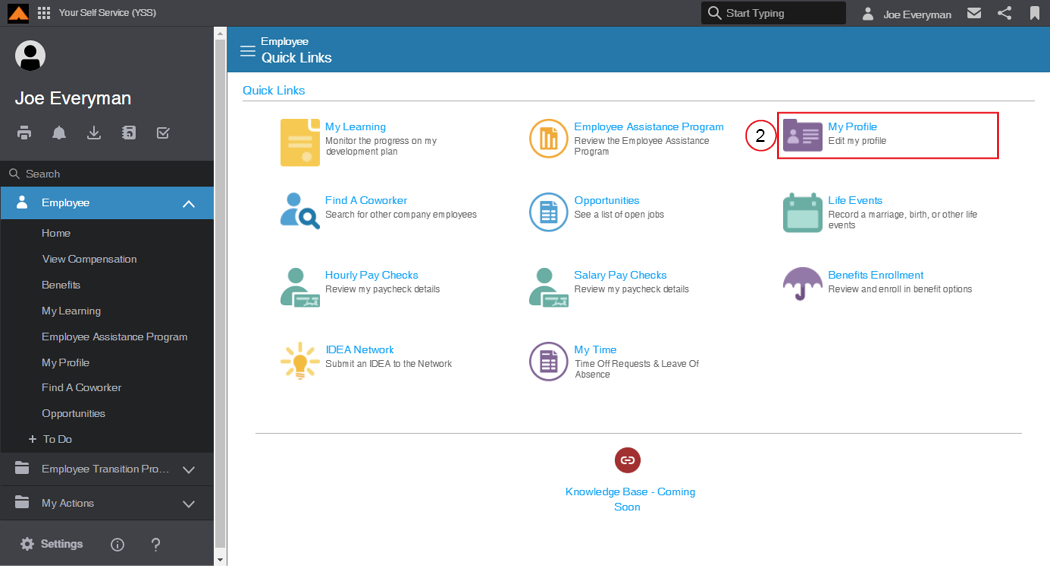
Employee Home Page
| STEP 2 | Click My Profilefrom the Employee Quick Links. |
The Employee Profile page displays.
Employee Profile Page
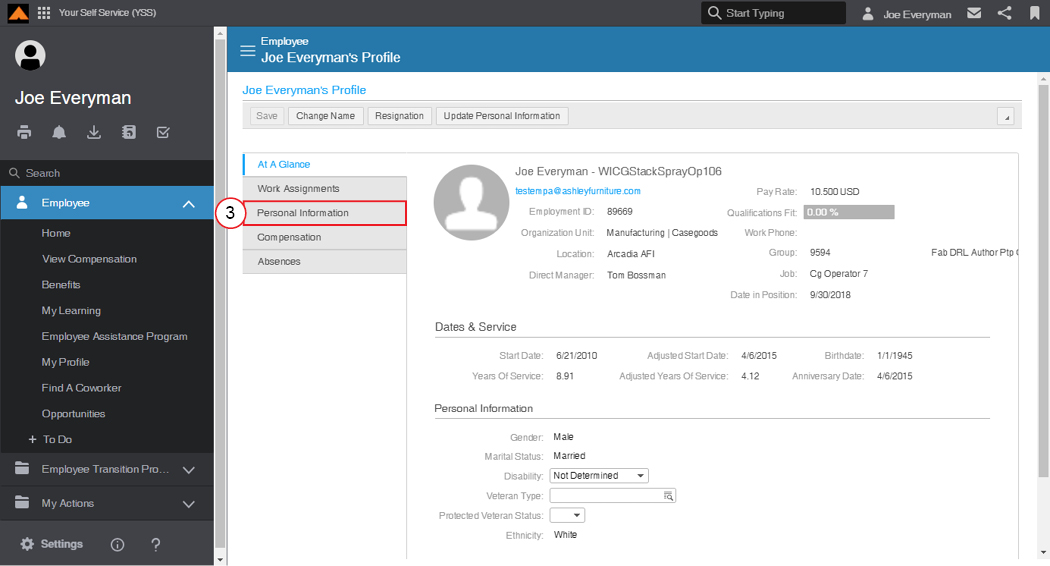
| STEP 3 | From the menu tabs, select Personal Information. |
The Personal Information page displays.
Personal Information Page
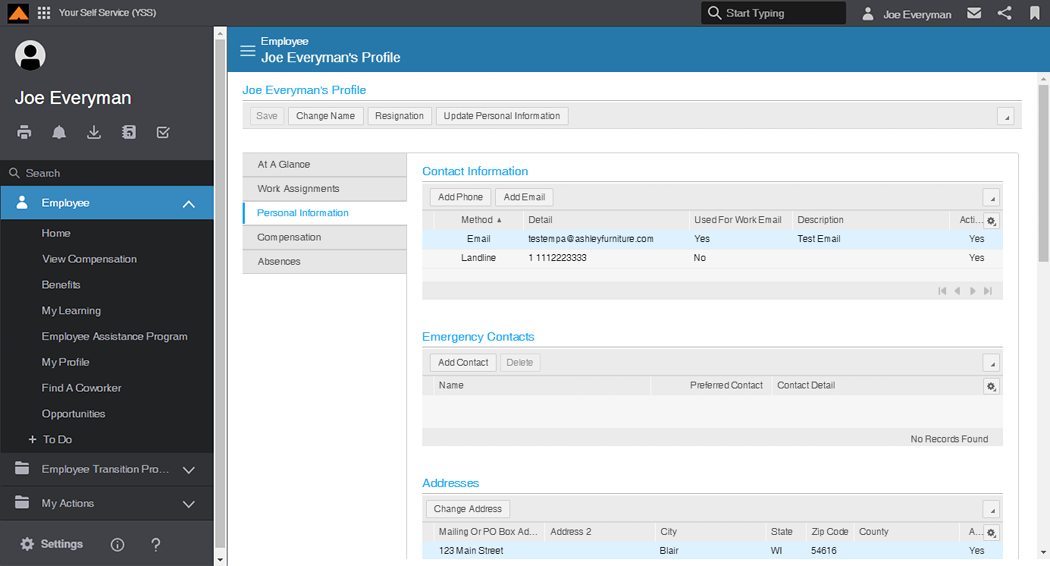
| STEP 4 | In the Direct Deposit and Pay Card Details section, review any bank information previously set up. |

Direct Deposit and Pay Card Details Section
Add a Bank Account
Direct deposits must have a bank account designated where funds will be deposited.

Direct Deposit - Pay Card Form
| STEP 1 | In the Begin field, select the date you would like to start depositing your pay into this account. |
|
NOTE |
Please allow a minimum of ten (10) business days from the Begin date for the bank verification process. Once the bank successfully completes testing, your direct deposit will process on the next pay date. You will receive paper checks for any pay days that occur during the verification process. |
| STEP 2 | In the Direct Deposit Routing Number field, type your bank account routing number. Refer to the Sample Check to find where this information is located on your personal checks or contact your bank for this information. |
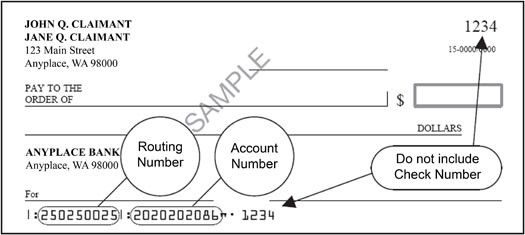
Sample Check
| STEP 3 | In the Account Number field, type your bank account number. |
|
NOTE |
Please provide accurate account and routing numbers. You will be notified about any problems, but discrepancies may require more time for additional testing. Paper checks will continue during the verification process even if it takes more than ten business days. |
| STEP 4 | From the Account Type drop-down menu, select the account type. |
If this is your first time setting up a bank account, the system will default to Percent 100% and the Flat Amount field will not be available. Skip to STEP 6.
After you have a bank account set to receive 100% of your paycheck, you may add another bank account to deposit a specific amount of money. The Flat Amount field is required when adding an additional bank.
| STEP 5 | In the Flat Amount field, type the amount of your paycheck that you would like deposited into this account. |
| STEP 6 | Click the OK button. |
The Success message displays.

Success Message.
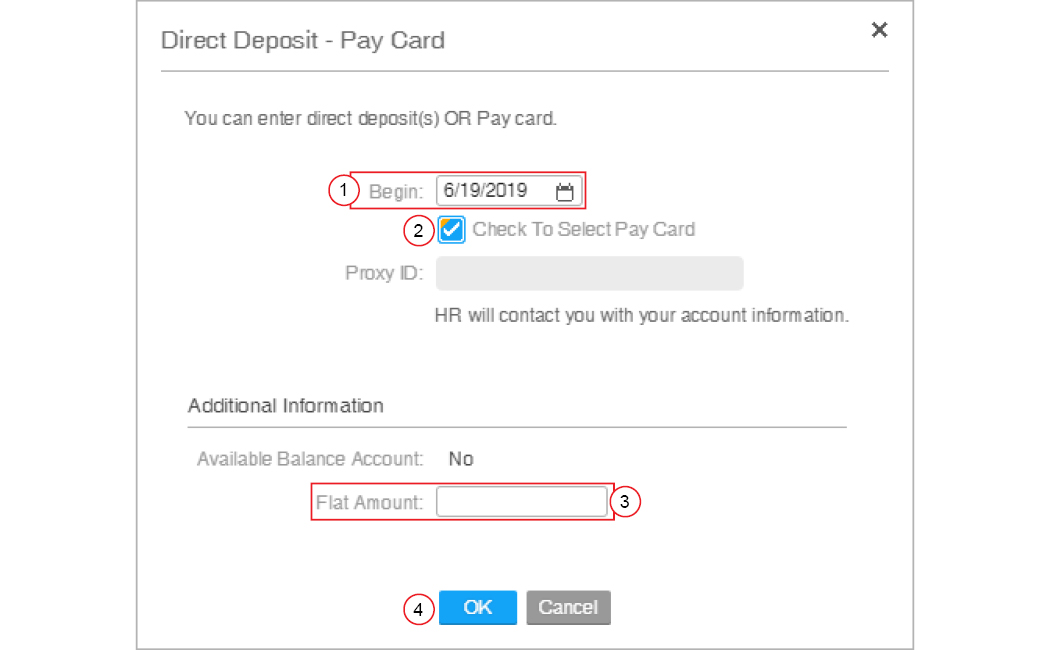
Add a Pay Card
Pay cards are optional for some Ashley employees. (Limited to trial locations)
Direct Deposit - Pay Card Form
| STEP 1 | In the Begin field, select the date you would like to start depositing your pay into this account. |
| STEP 2 | Select the Check to Select Pay Card check-box. |
| STEP 3 | In the Flat Amount field, type the amount of your paycheck that you would like deposited into this account. |
| STEP 4 | Click the OKbutton. |
The Successmessage displays.
Success Message
Your local HR department will contact you with account information.
Edit or Close an Account
These types of changes are currently available for existing bank accounts.
- You can promote an account to the default account.
- You can inactivate an account that you no longer wish to receive funds.
- You can update the flat amount of your deposits.

Direct Deposit and Pay Card Details Section
| STEP 1 | In the Direct Deposit and Pay Card details section, select the bank account you want to edit. |
| STEP 2 | Click the Make Default or Close Account button. |
The Change Direct Deposit Details page displays.
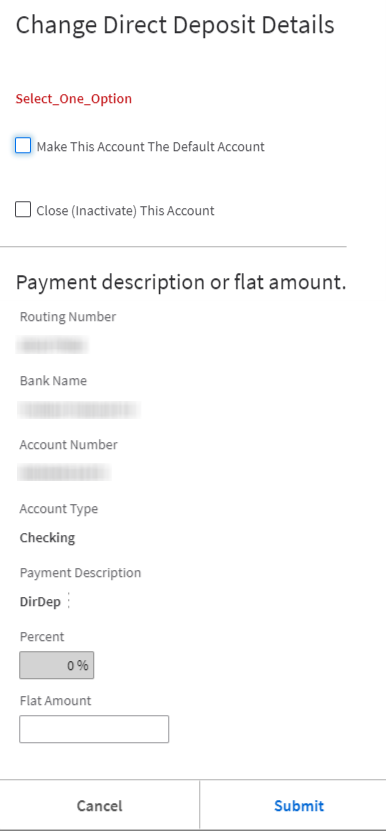
Change Direct Deposit Or Pay Card Details Page
| STEP 3 | Select the appropriate check-box: |
- To make this account the default, check Make This Account The Default Account.
Or
- To inactive this account, check Close (Inactivate) This Account .
| STEP 4 | Click the OK button. |